Let’s make an adorable cross craft to celebrate the Easter season! With a few materials and some creative touches, your homeschooler will have a beautiful reminder of Easter’s true meaning and a fun piece of art to display. Check out the instructions below to get started!
Materials:
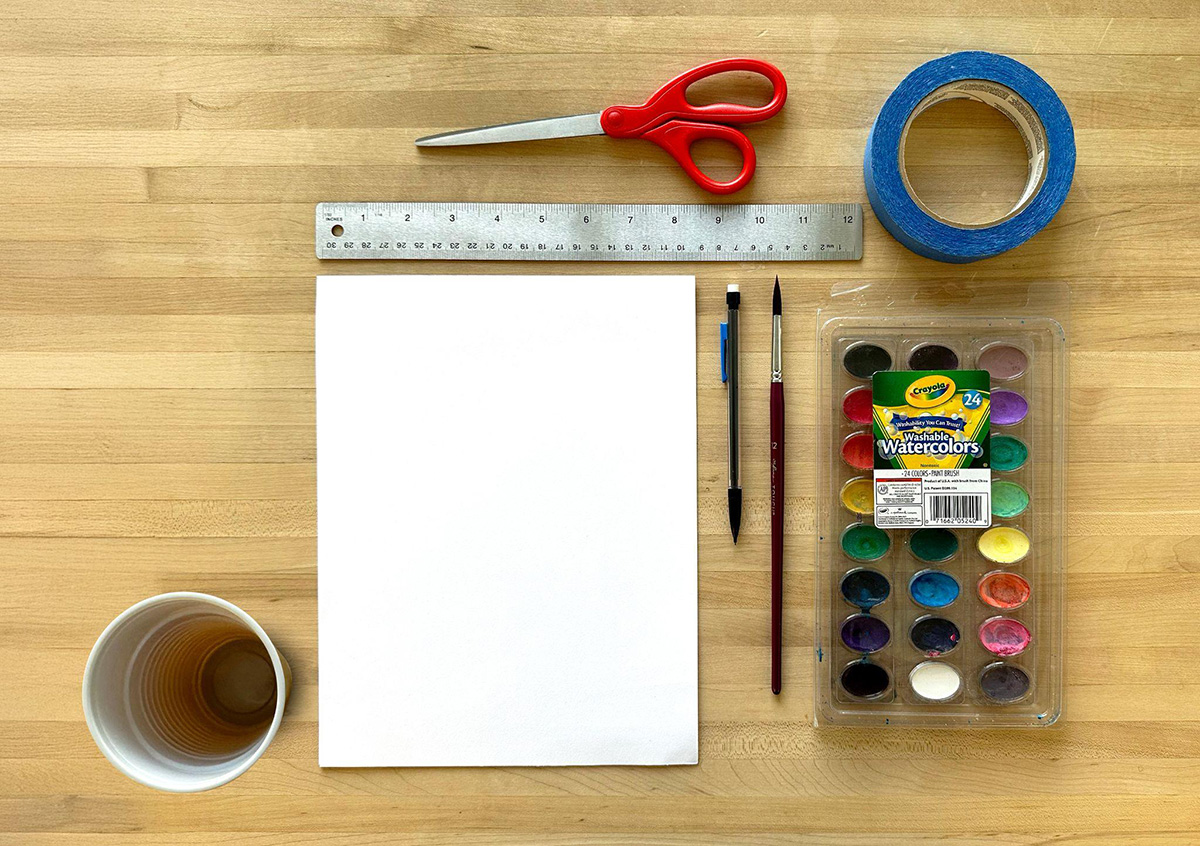
1 piece of 8.5 x 11-inch white card stock or other heavy-duty paper
1.5 or 2-inch-wide painter’s tape or masking tape
Scissors
Pencil
Ruler
Watercolor paint
1 cup of water
Step 1:
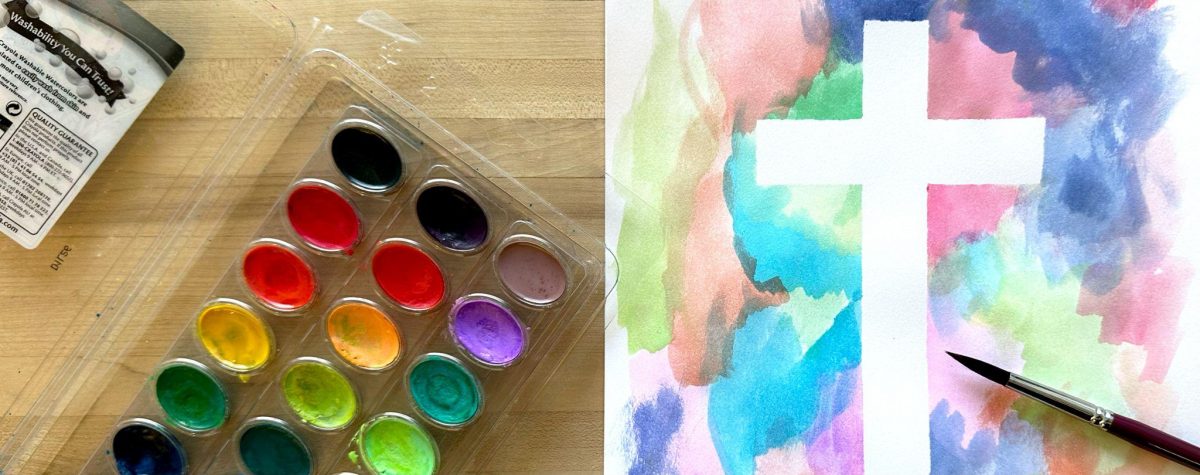
Measure and cut two pieces of painter’s tape: one 7-inch piece and one 4-inch piece. Place the 7-inch tape vertically in the middle of the card stock. Then place the 4-inch piece horizontally, 2/3rds of the way up on the vertical piece, forming a cross.


Step 2:
Using your watercolors, paint the background, filling in all the white space. Avoid getting the paper too wet with the paint to make removing the tape easier. Let your child’s creativity shine as they decorate their cross with their favorite colors and designs! Don’t worry about getting paint on the tape.


Step 3:
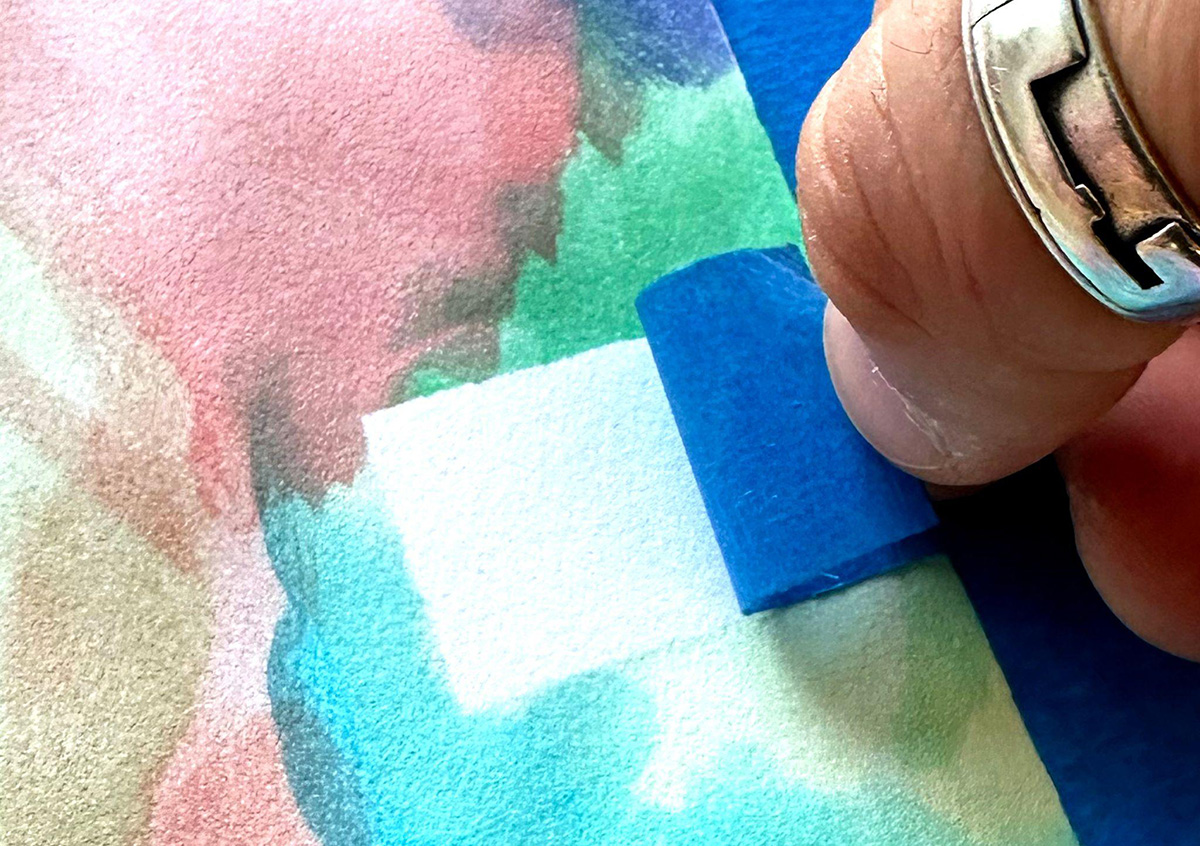
Pull the tape off when their artwork is completely dry. If the paper starts to pull, try from a different angle!
Ta-da! Now you have a beautiful cross to help your homeschooler celebrate Easter! Whether you hang up your child’s artwork for everyone to see or share it with family members or friends, everyone will appreciate the thought and creativity behind this festive Easter craft.

Don’t let the fun stop here! Find even more ideas and activities on our homeschool craft blog.


Violet Salyer:
April 18, 2025Thank You, I really like this craft
Reply to this Comment